All Categories > Users and Account > How can I add a new user?

How can I add a new user?

Set up your company account by creating individual profiles or inviting multiple employees via email.

This article is intended for Managers and Admins.

Add/Invite People

1. Create/Invite a New User

1Open the Settings menu.
2Go to People.<p>Go to <em>People</em>.</p>
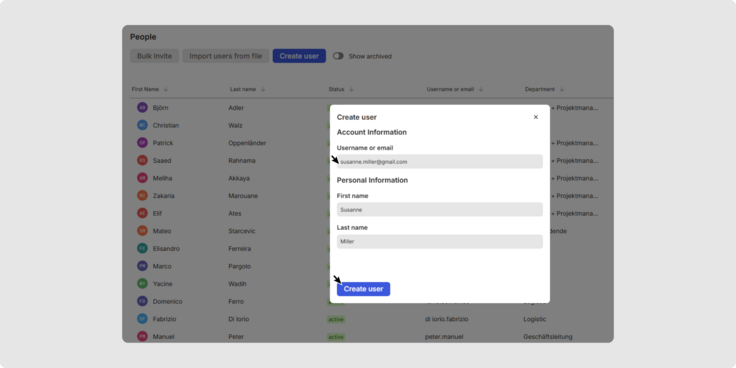
3Click Create User.
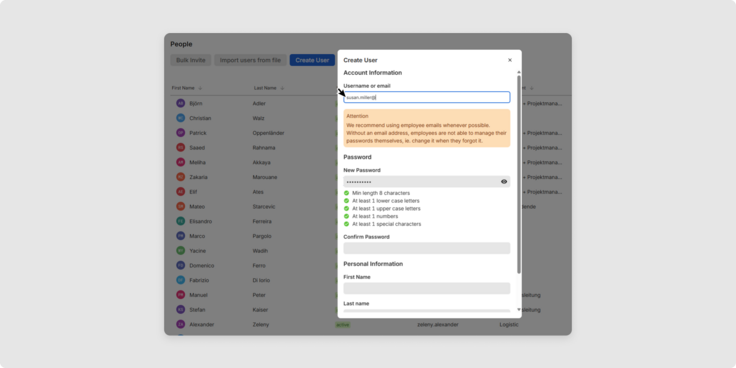
4Enter the username or an email address.
5Click Create User.
Tip: We recommend adding email addresses for all employees so they can manage or reset their passwords themselves.
Create a user_1
Create a user_2

2. Bulk Invite / Invite Multiple Users via Email

1Click Invite Multiple Users.
2Enter the email addresses of the users.<p>Enter the email addresses of the users.</p>
3Click Invite.

3. Import Users from File

1Click Import users from file.
2Choose the program from our Integration Center that you use for user management.

In the Integration Center, you will find several user management programs available:

  • Learn more: Learn details about the user management program.

  • Contact us: Want to use this integration? We’ll be happy to set it up for you.

  • Configure: Set up this integration yourself.

If your desired program is not available, please contact us to request it.
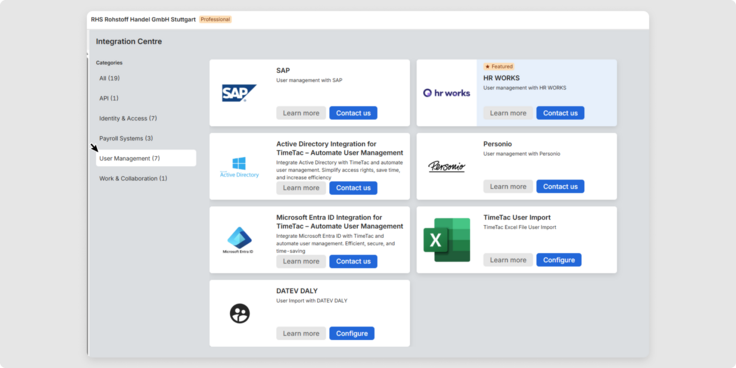
Import Users from File

4. Create a User

Account Information


Enter the TimeTac start Date. This determines from which date the person can track time, manage absences, and view balances.
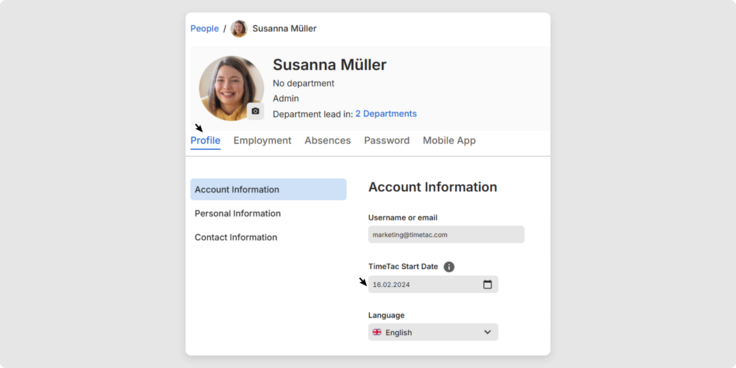
Define the Employment Informations


Adding information under the Employment tab is optional. However, entering the employment start date, relevant work schedule and its start date, as well as the break rules with break rules start date, is important so that TimeTac can perform accurate calculations.


1Open the Settings menu.
2Go to the People section.
3Define the Employment Start Date.
4Select the relevant work schedule and specify from which date it should apply.<p>Select the relevant work schedule and specify from which date it should apply.</p>
5Add a break rule: Select the appropriate template from the drop-down list and define the start date from which the break rule should apply.<p>Add a break rule: Select the appropriate template from the drop-down list and define the start date from which the break rule should apply.</p>
6Click Update Profile.

Assigning a department is not mandatory. Learn how to create departments in this Help Center article.


Define Absences


Set the employee’s non-working days (public holidays) and leave days, and the leave day interval.

1Go to the Absences tab.
2Select the appropriate Holiday Template for the employee from the drop-down template list.
3Under Template Start Dat, define the date from which the calendar should apply.<p>Under Template Start Dat, define the date from which the calendar should apply.</p>
4Define the Leave days interval and the date when the next leave period starts.<p>Define the Leave days interval and the date when the next leave period starts.</p>
5Click Update Profile.
Info: Once absences are defined, TimeTac automatically performs the correct calculation at the end of the accounting period and provides the additional leave days for the following year/s.

You’ve learned how to add people to your account to manage your team more effectively with time tracking.

Was this Article useful for you?

Yes, this was useful

No, this was not useful