All Categories > Setup your Timetac account > How to create department structures?
How to create department structures?

In this article, you will learn how to structure your organization by creating departments. This helps establish clear responsibilities and simplifies administration.
This article is intended for Managers and Admins.
Create departments
1Open the Settings menu.
2Go to Departments.
3Click the Create Department button.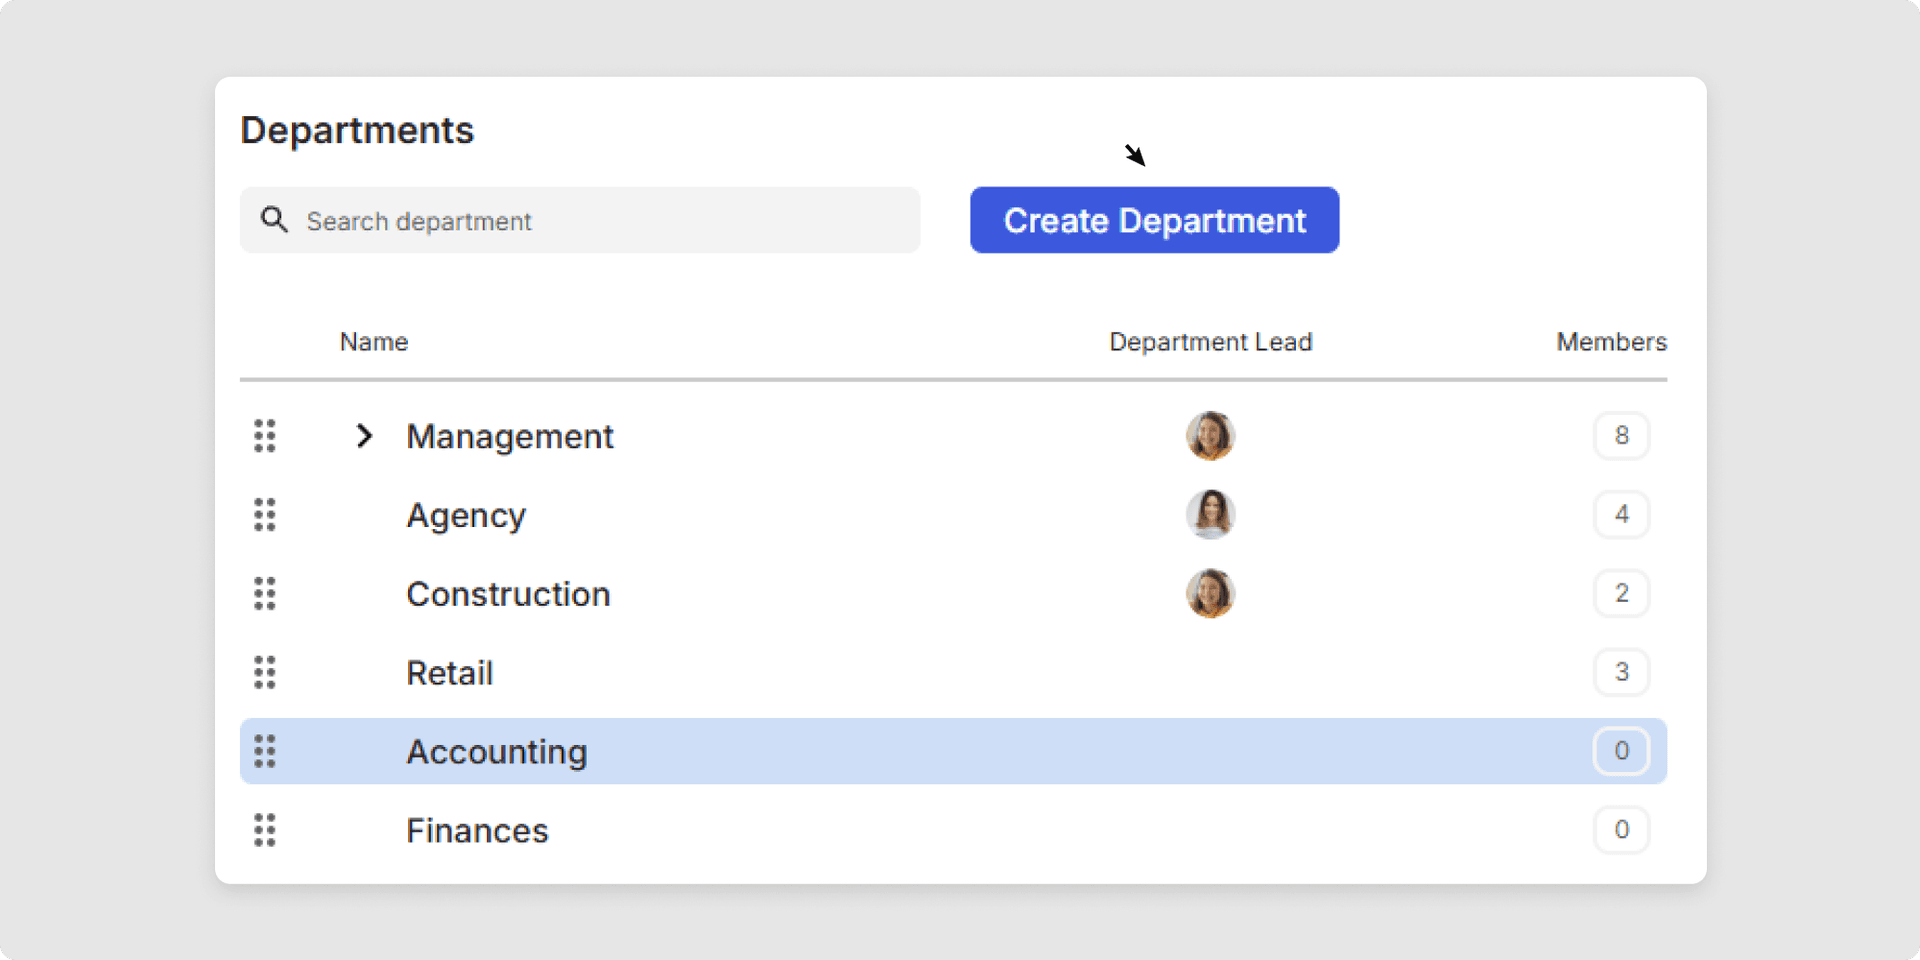
4Enter a name for the department.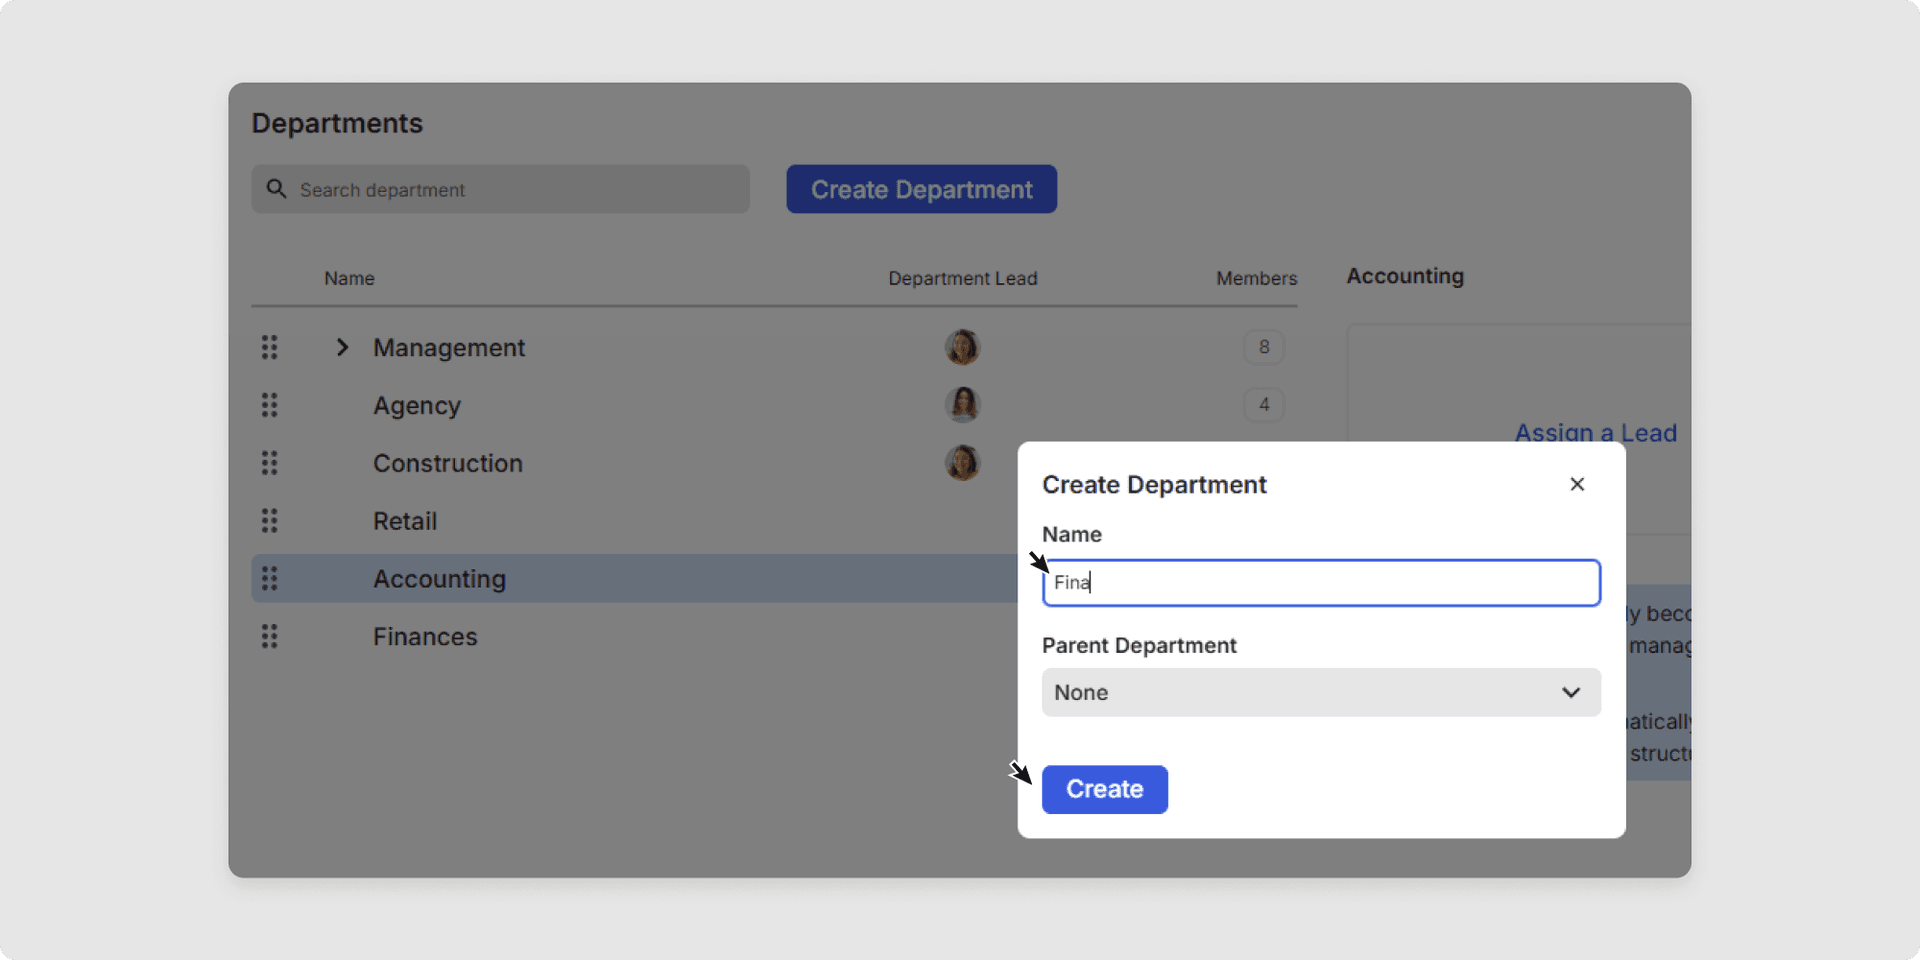
5Open the three-dot menu to edit or delete a department.
Departments, sub-departments or their members can also be moved using drag and drop.
Edit or delete a department
1Select the required department.
2Use Settings (three vertical dots) to access the functions: Edit department or Delete department.

2. Assign a department head or deputy
1Select the required department.
2Click Assign a Lead and/or Assign an Assistant.
3Click on the name of the person or put the name into the search field.

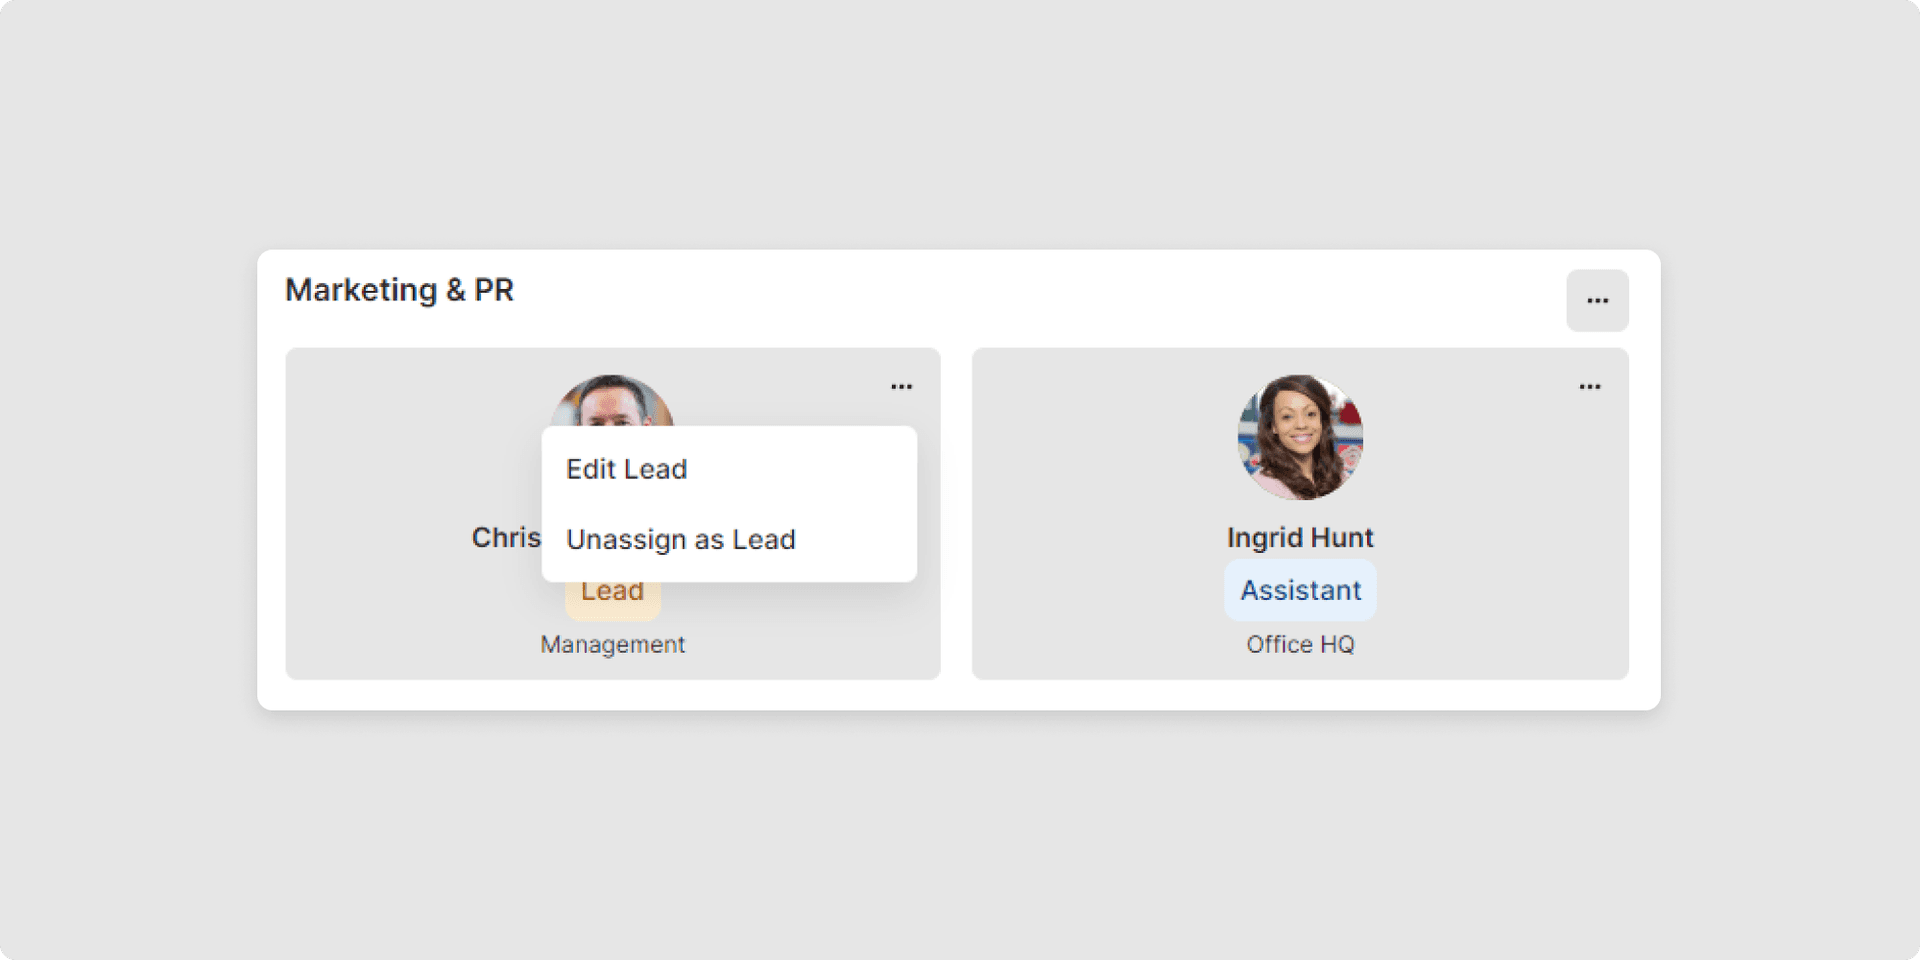
Change the role assignment of head of department/deputy
1Click on Settings (three vertical dots) to change the role assignment in Edit Lead.
2You can also remove the role assignment by clicking on Unassign as Lead.
3. Add members to a department
1Select the relevant department.
2Click the button Please add your first member.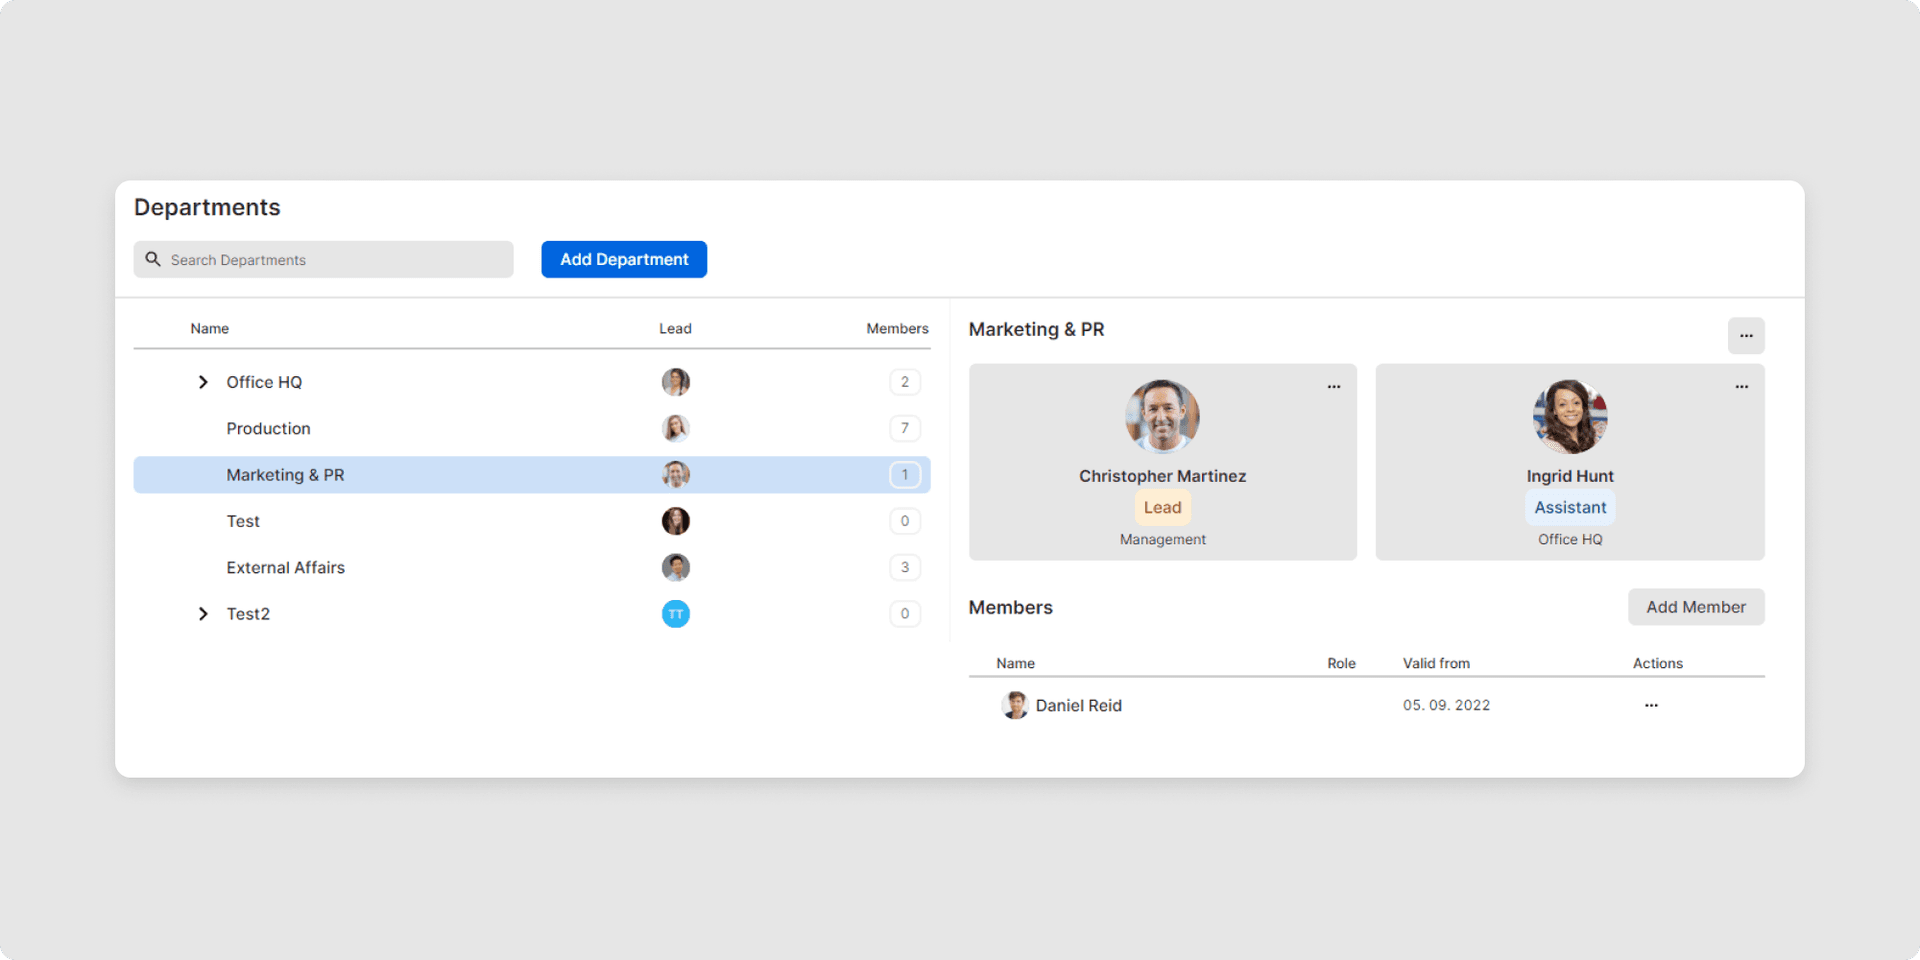
3Another window will be displayed, there you can select the relevant members. Complete the action by clicking Add. You can also Choose a start date to specify when the change should take effect. A date in the future cannot be selected.

You have now learned how to structure your organization with departments, making it easier to manage teams and responsibilities.
Was this Article useful for you?
Yes, this was useful
No, this was not useful