All Categories > Setup your Timetac account > How to create and change tasks?
How to create and change tasks?

You can track working times on different tasks. This article explains how to create and change tasks.
Create a new task
1Go to the Settings menu and select Tasks in the Time tracking menu.
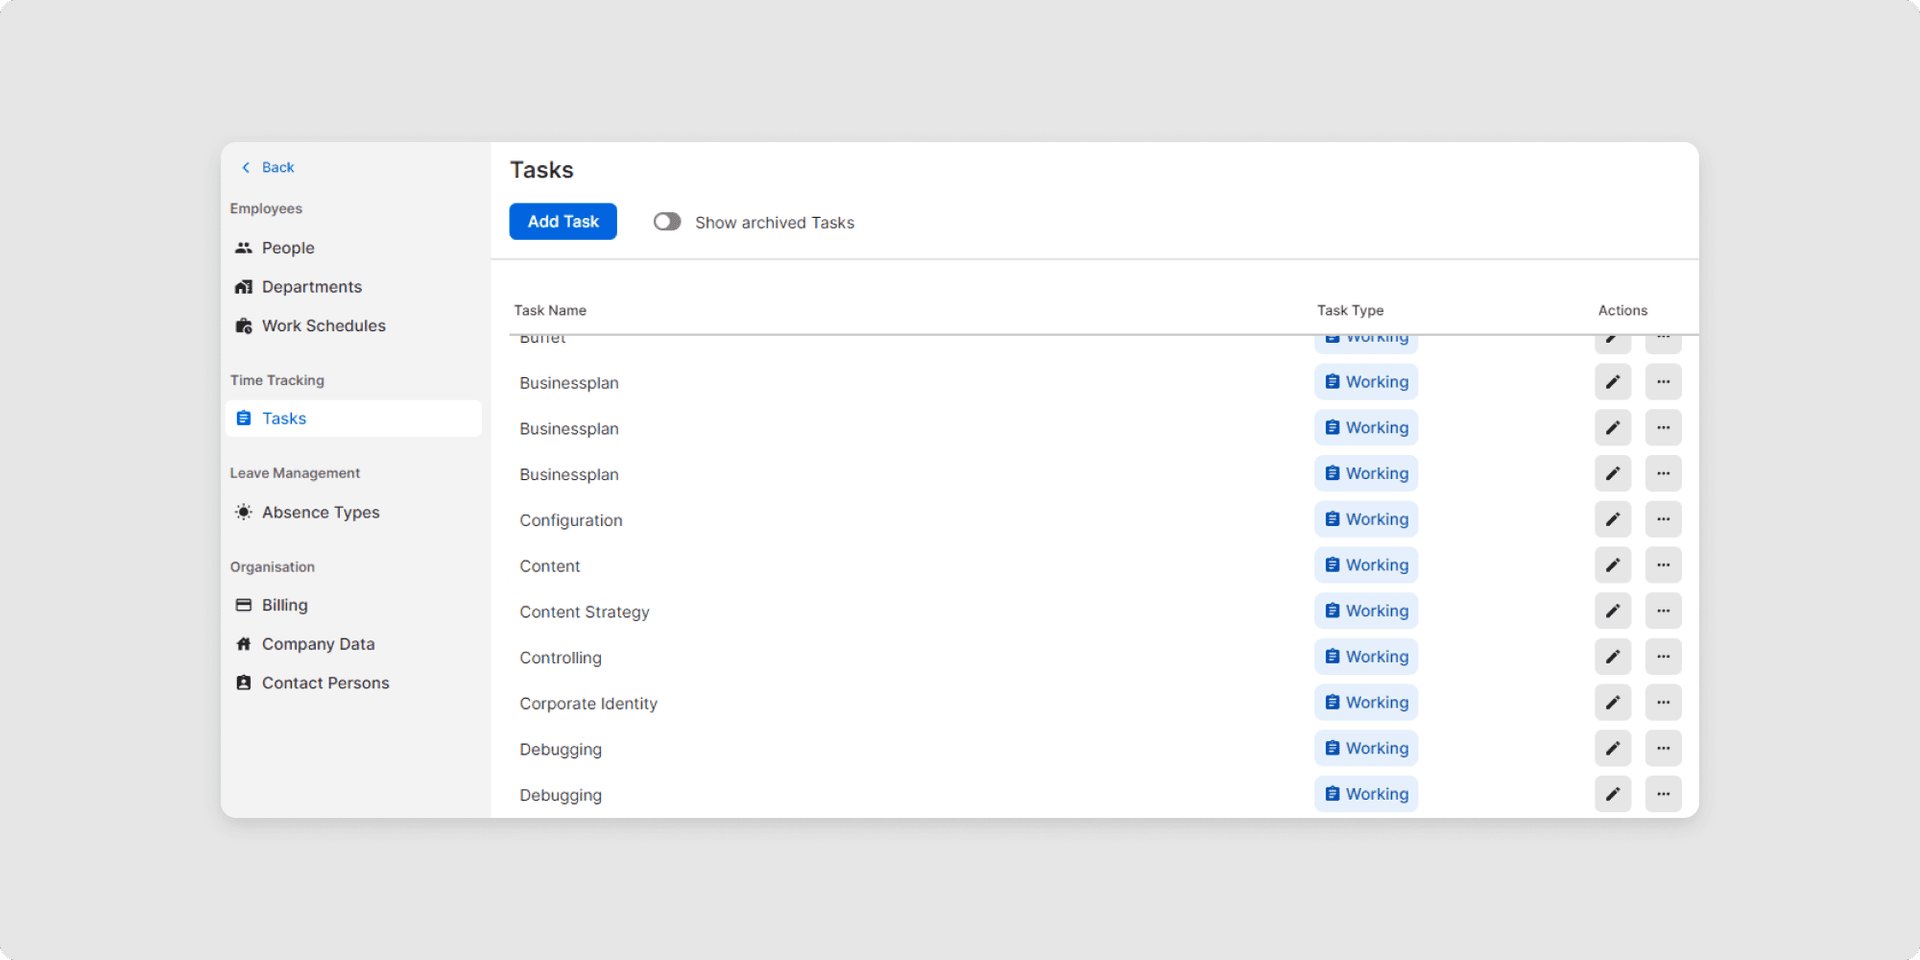
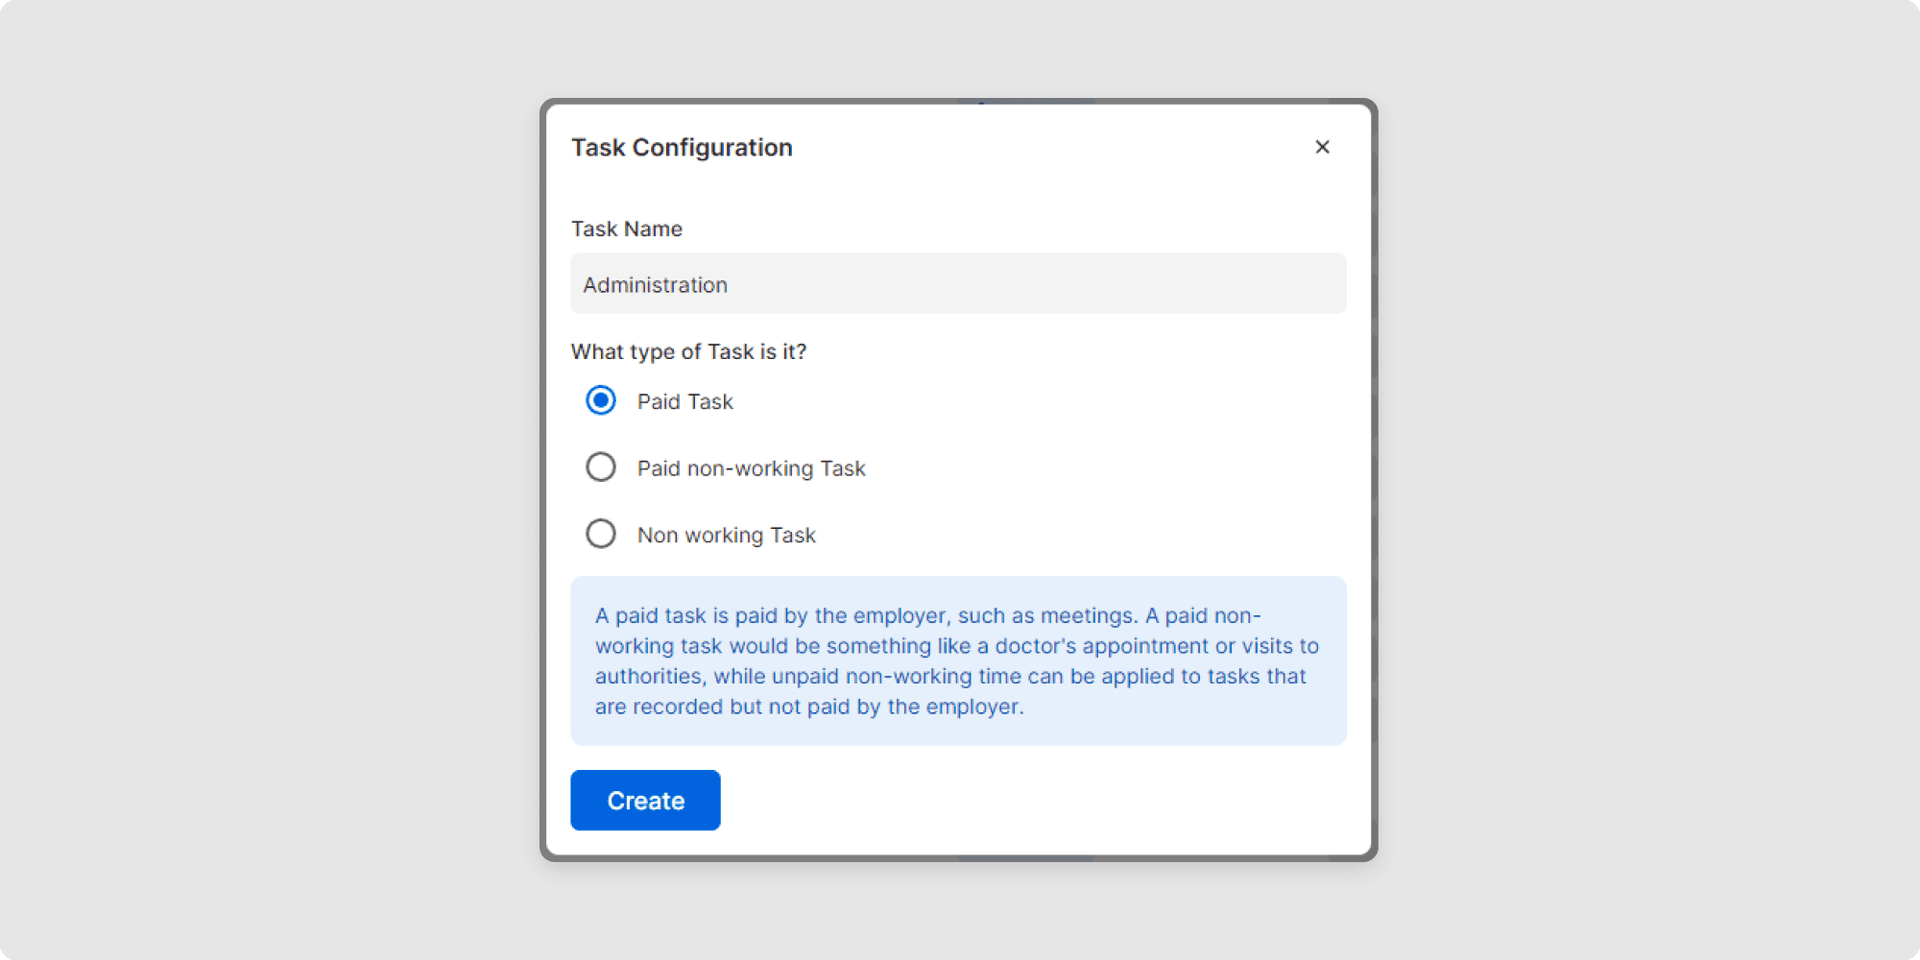
2To create a new task, click on Add task. Name the new task and define the type of task. The following options are available to you: Paid task, Paid non-working task or Unpaid non-working task.
3After selecting the desired options, click on Create and the new task is created.
4Once the task has been successfully created, a green information box appears in the bottom right-hand corner of the screen, Task successfully created.
Change task
1To change the task, click on the pencil symbol next to the desired task and make your adjustments in the selection menu.
2Then click on Update to confirm your changes.
3Once the task has been successfully updated, a green Task successfully processed information box appears in the bottom right-hand corner of the screen.
Archive task
Tap the more icon (⋮) for the desired task and select Archive.
Good luck with managing your tasks - if you have any questions, we will be happy to help you!
Was this Article useful for you?
Yes, this was useful
No, this was not useful