All Categories > Integrations > How do I set up SSO access via Microsoft Entra ID as IdP?
How do I set up SSO access via Microsoft Entra ID as IdP?

This article shows you how to activate single sign-on via Entra ID in TimeTac.
An initial step in connecting Microsoft Azure with TimeTac is creating and configuring enterprise applications within your Microsoft Entra ID, which will be ‘in charge’ of communicating with our TimeTac system.
Prerequisites
To set up SSO for an application that you will add to your Entra ID tenant you need:
- An Entra ID account with an active subscription.
- One of the following roles: Global Administrator, Cloud Application Administrator, Application Administrator, or service principal owner.
- Your admin user needs an Entra ID Premium license to configure SAML single sign-on for a non-gallery application.
Configure SAML-based Single Sign-On
1Sign in to the Entra ID portal https://portal.azure.com as a cloud application admin or an application admin for your Entra ID tenant.
2Navigate to Microsoft Entra ID and select Enterprise applications from the menu on the left.
3Create a New application and click on Create your own application.
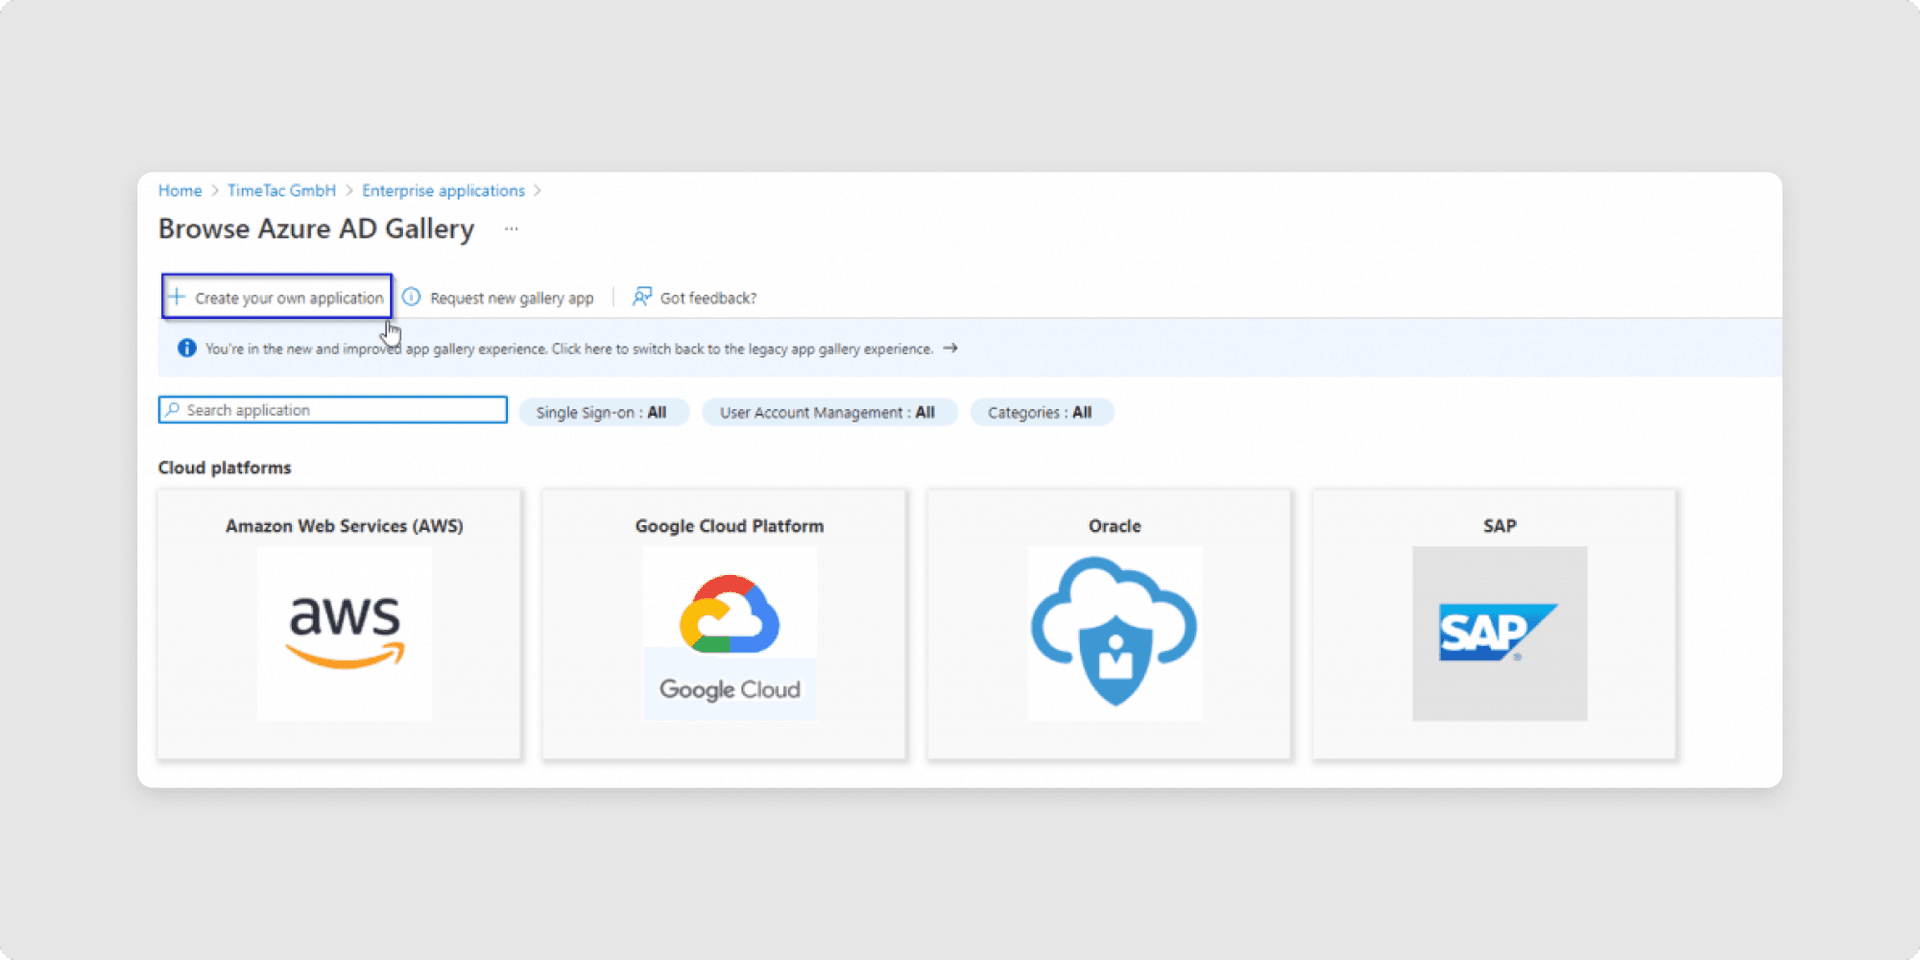
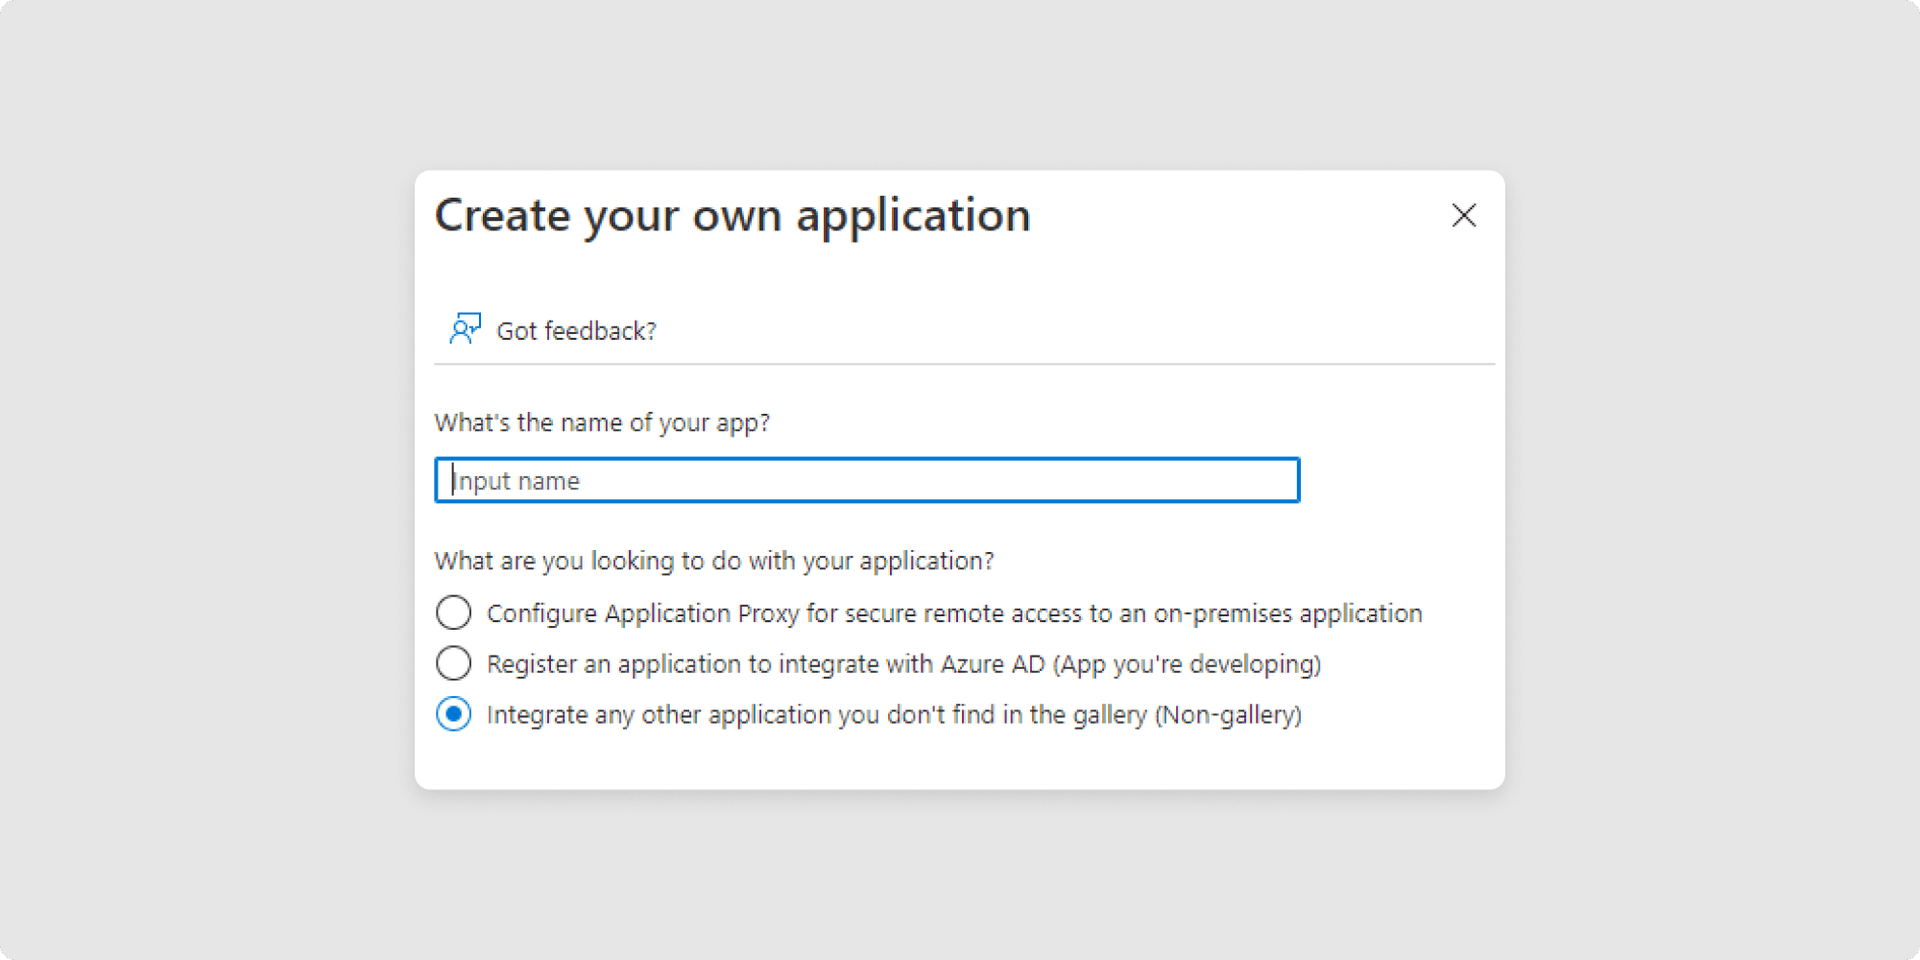
4Type in the Name for your new application, and select Integrate any other application you don’t find in the gallery. (Non-gallery) and create it.
5Once you create your new Enterprise Application you will be presented with a welcome screen. Click on Set up single sign-on.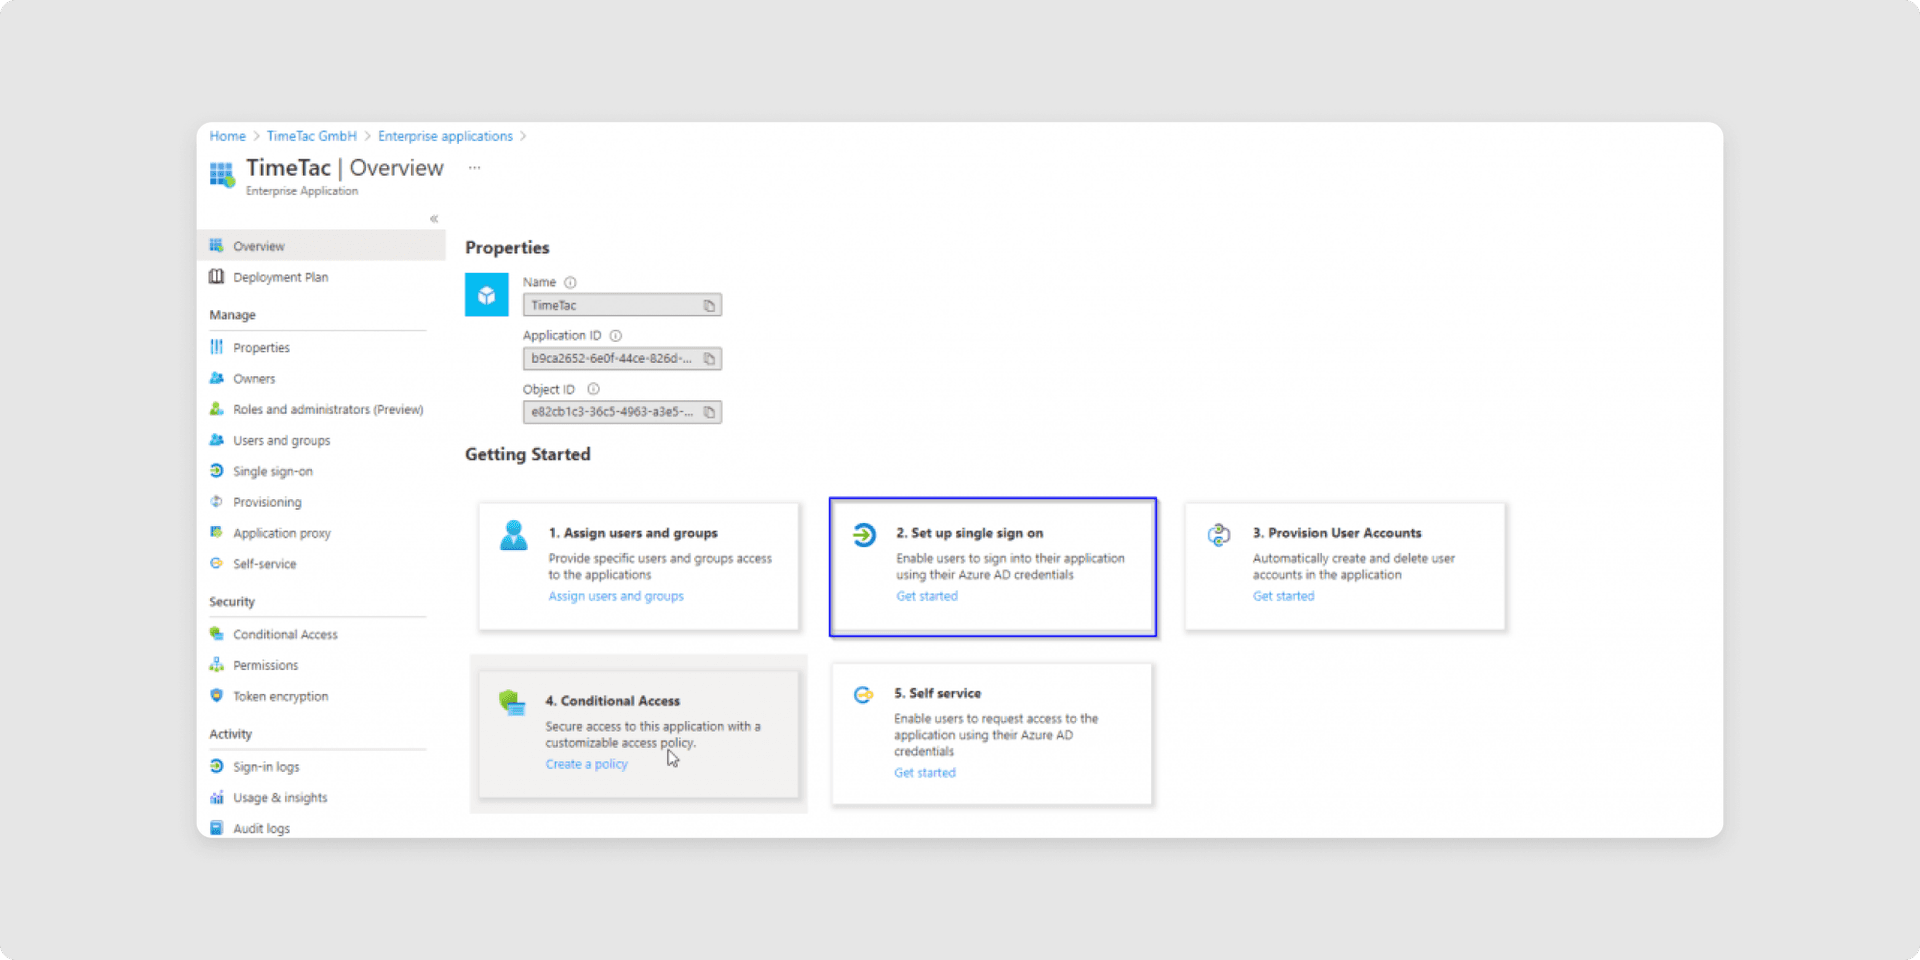
6Select Single Sign-on method as SAML.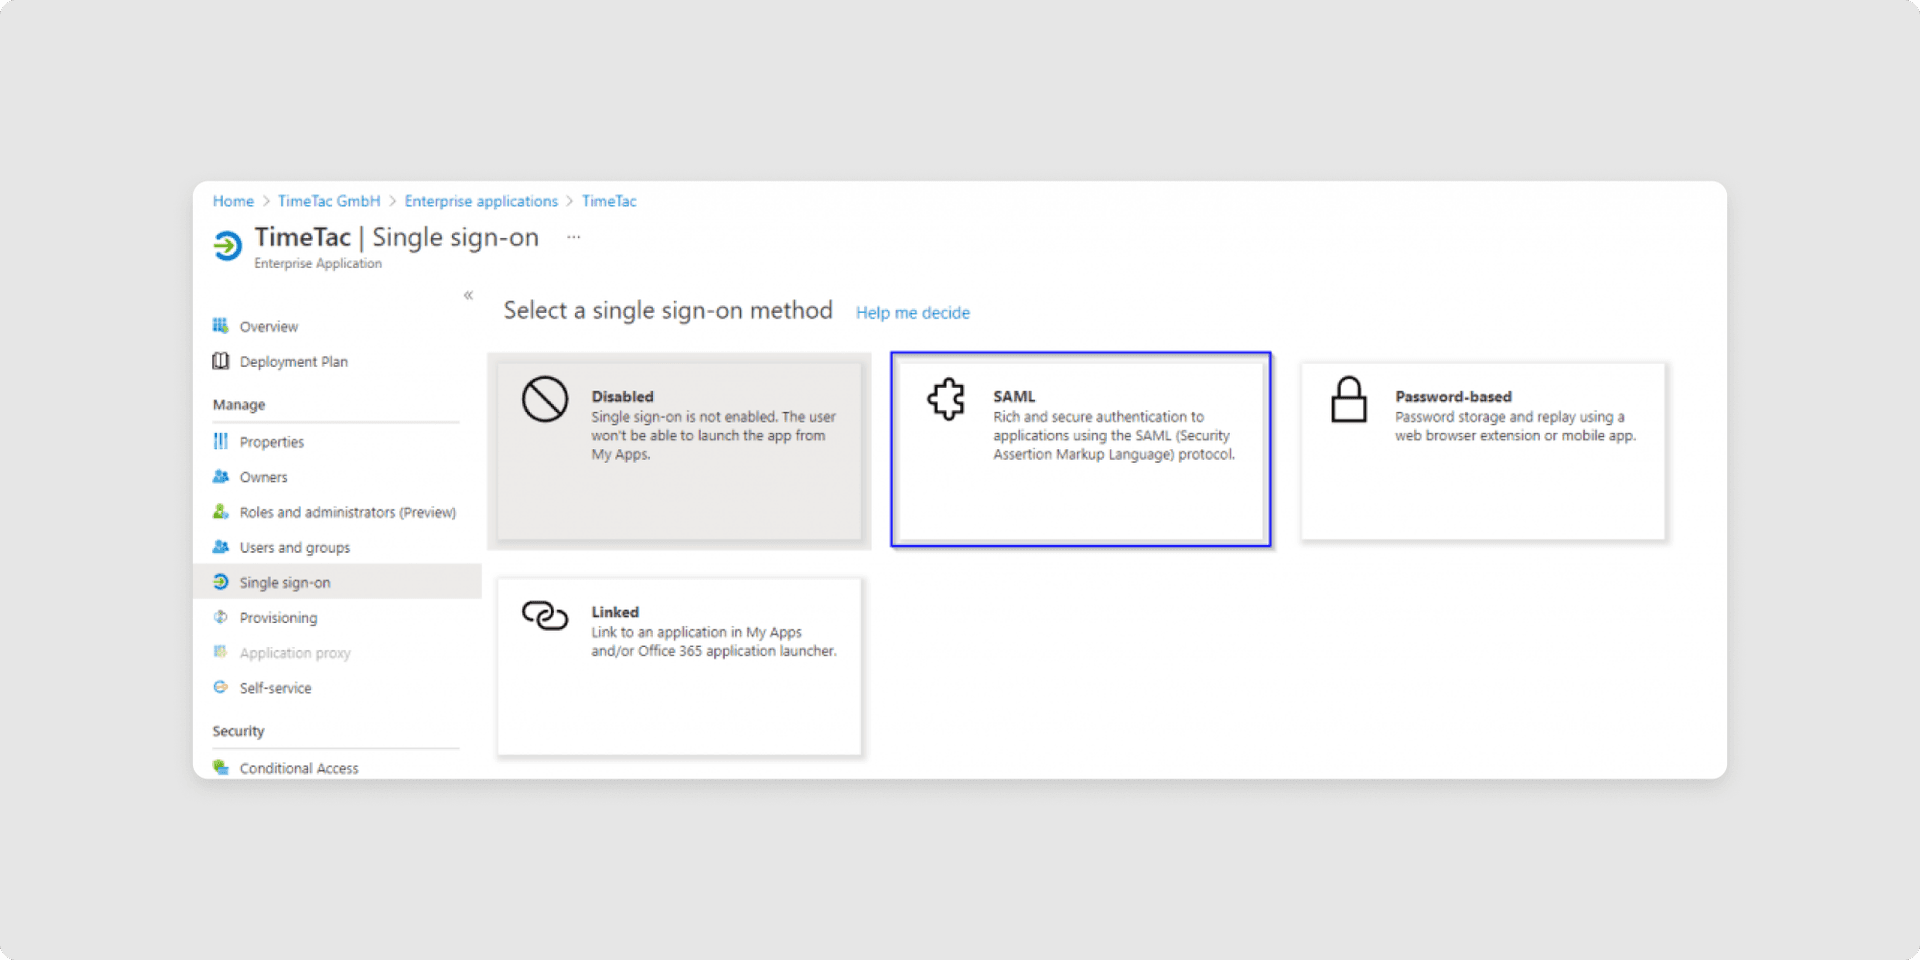
7In the section Basic SAML Configuration you need to define the Entity ID and the Reply URL: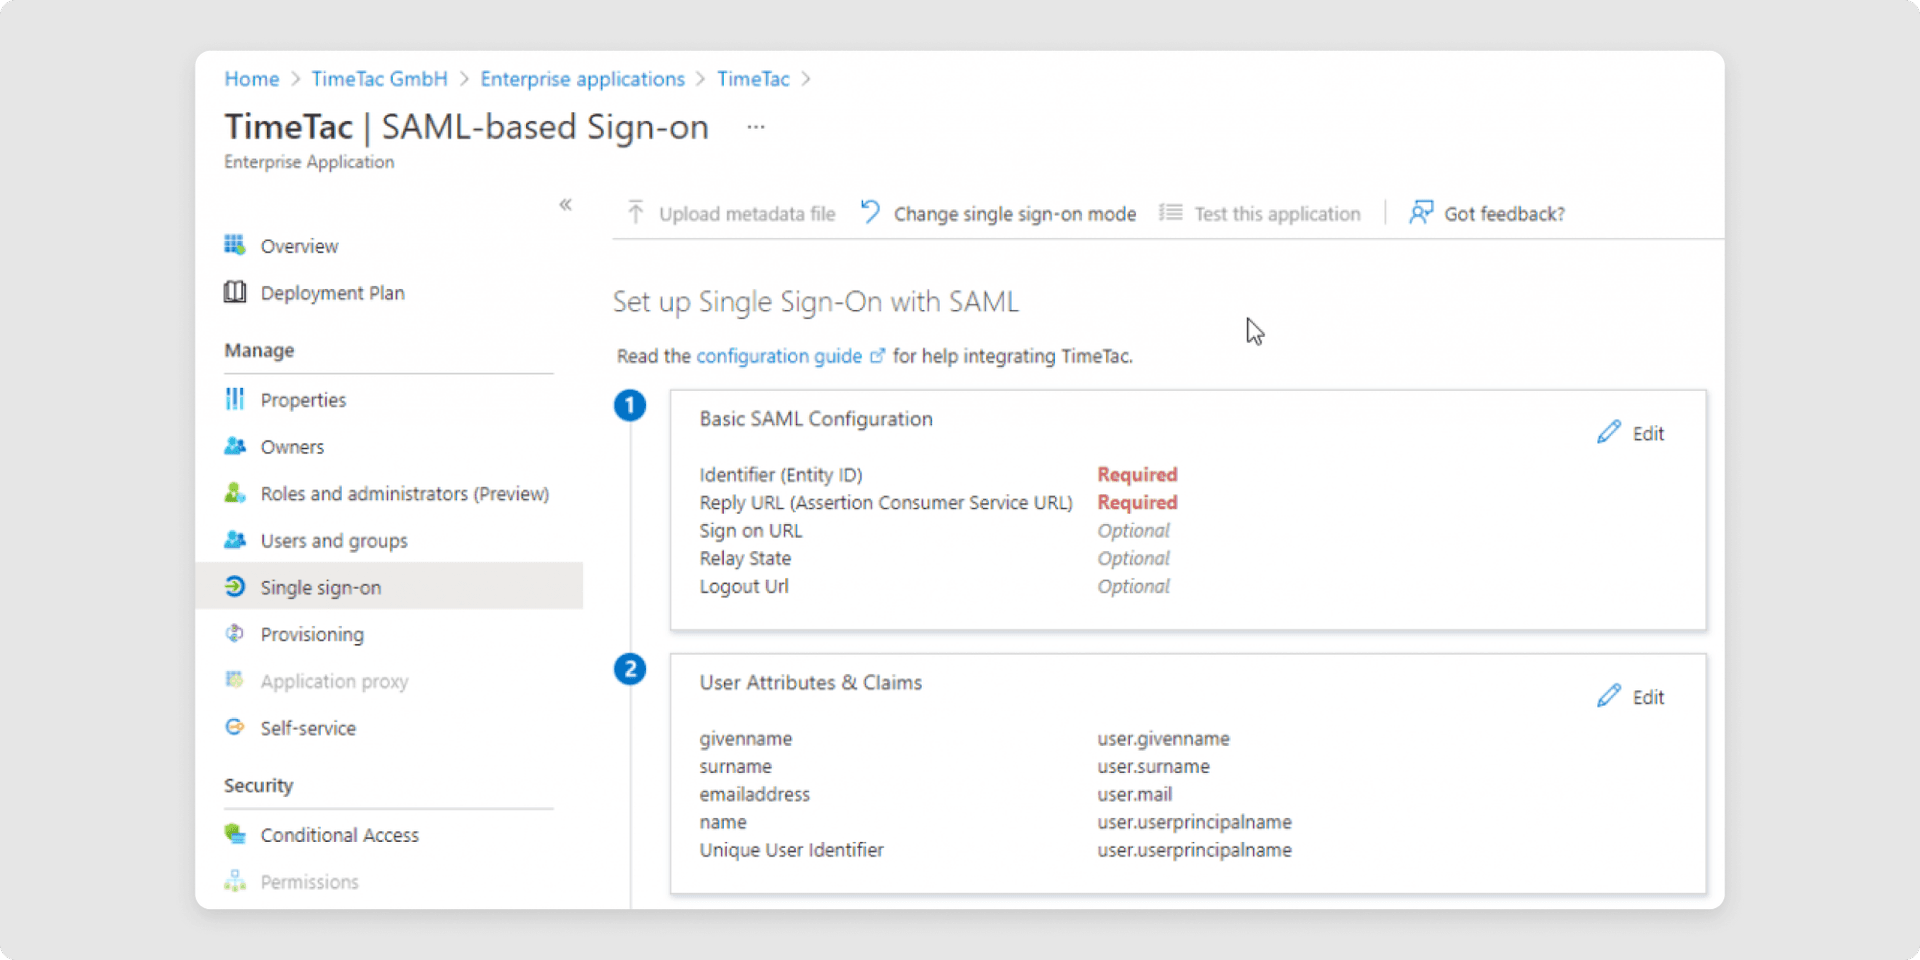
- Set the Identifier field: The identifier field is a predefined link that points out to a part of the TimeTac system which handles SAML communication. Please use https://go.timetac.com/{{accountName}}/modules/saml/consume.php. The {{accountName}} is a variable and should be replaced with your TimeTac company account name.
- Reply URL: Please use https://go.timetac.com/{{accountName}}/modules/saml/consume.php. The {{accountName}} is a variable and should be replaced with your TimeTac company account name.
8In the User Attributes & Claims section, set the email address as the Unique User Identifier and save.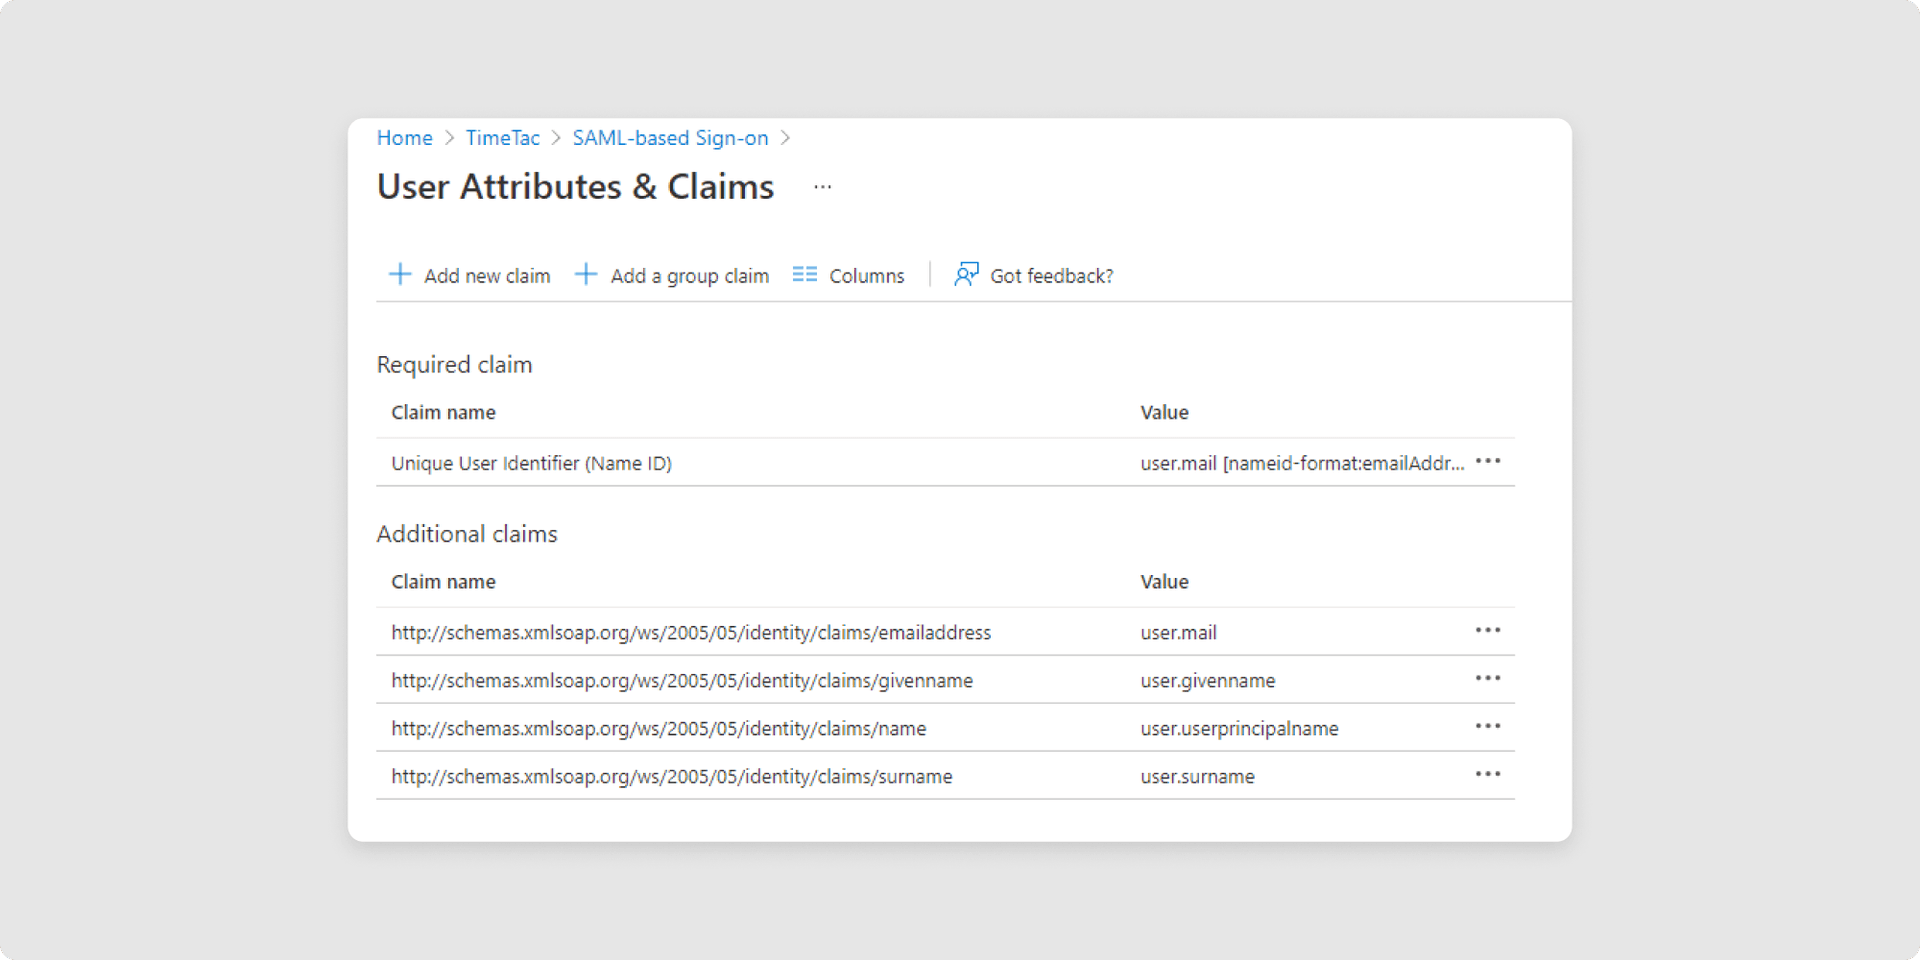
9In sections SAML Signing Certificate and Set up ‘Your Application Name‘ you will find information needed to configure SSO in your TimeTac account: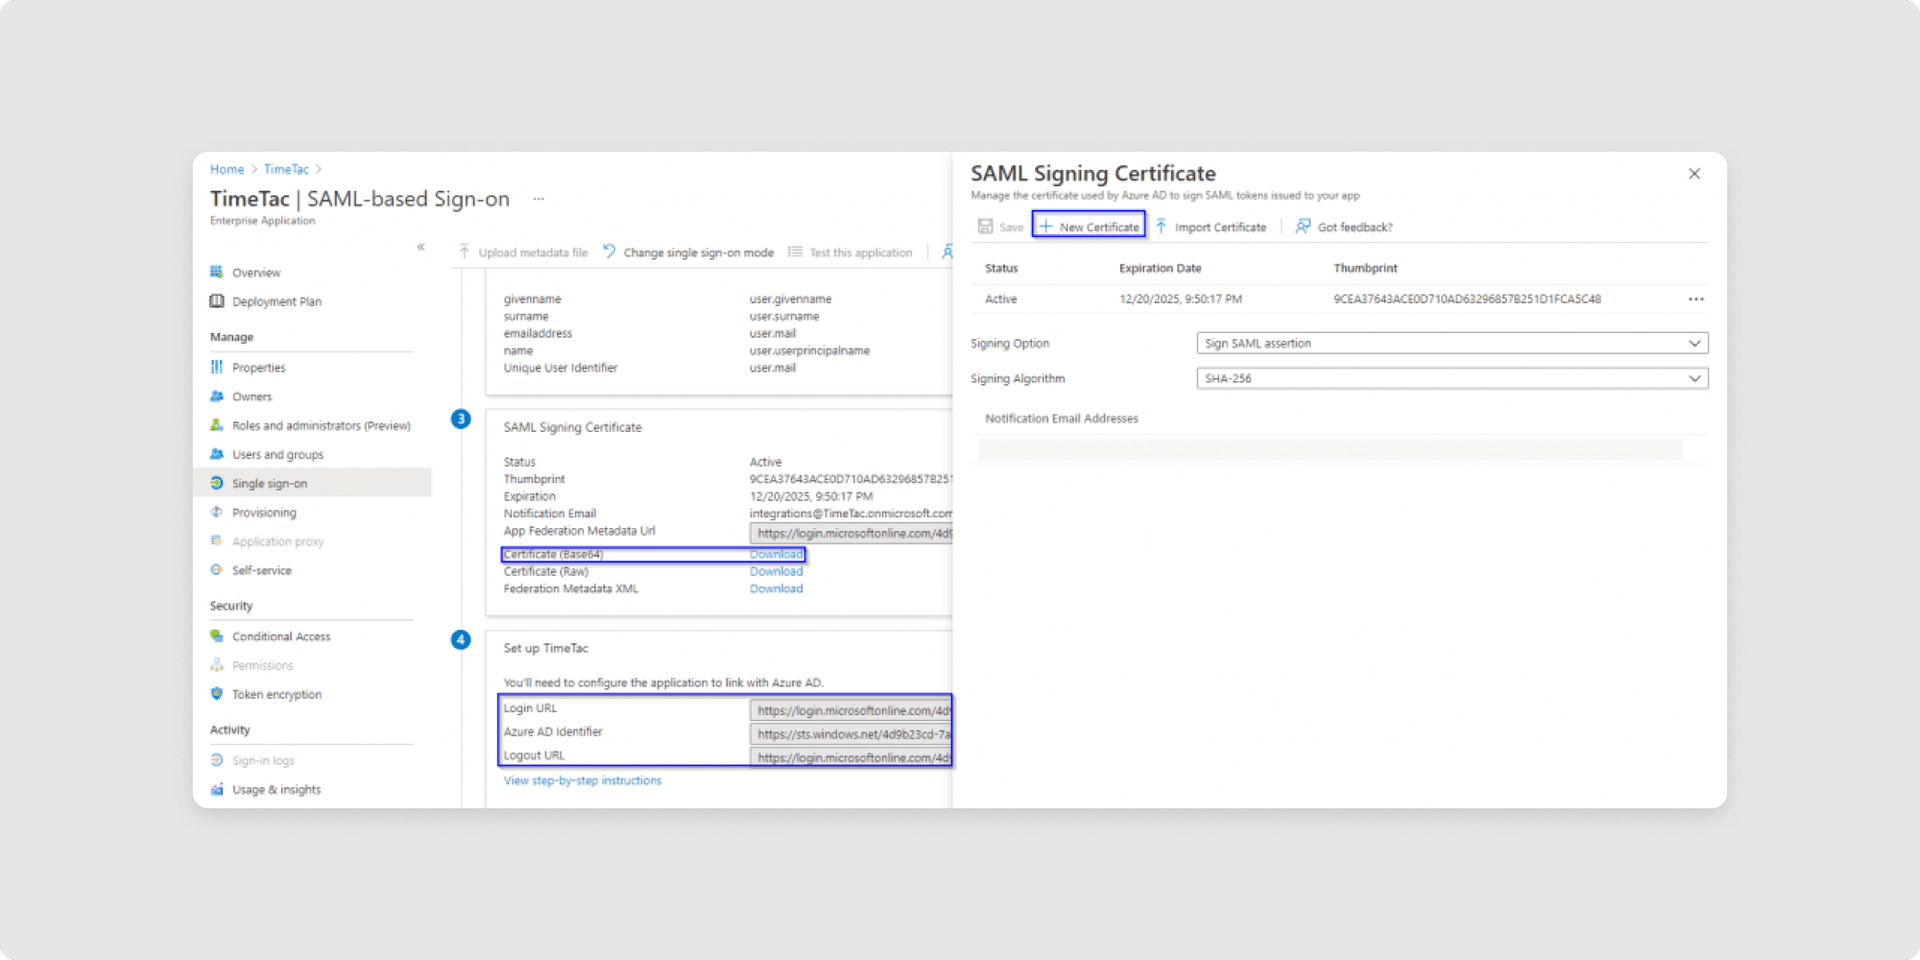
- Signing Certificate (x.509 certificate): Download by selecting Certificate (Base64). If there isn’t a certificate, you can generate one by clicking on the pencil symbol. A new page for certificate creation will open; click Save. Check the certificate's status; if it is not active, please activate the new certificate by clicking on the three dots and using the Make new certificate active option. Afterwards, download the certificate in Base64 form.
- Entity ID: you find it in the section Set up ‘Your Application Name‘ with Entra ID Identifier.
- Login URL: Can be found in the section Set up ‘Your Application Name‘.
- Logout URL: Can be found in the section Set up ‘Your Application Name‘.
10To make SSO work for a user, the user has been granted access to the SSO application in Entra ID, by assigning the user or a group to the application.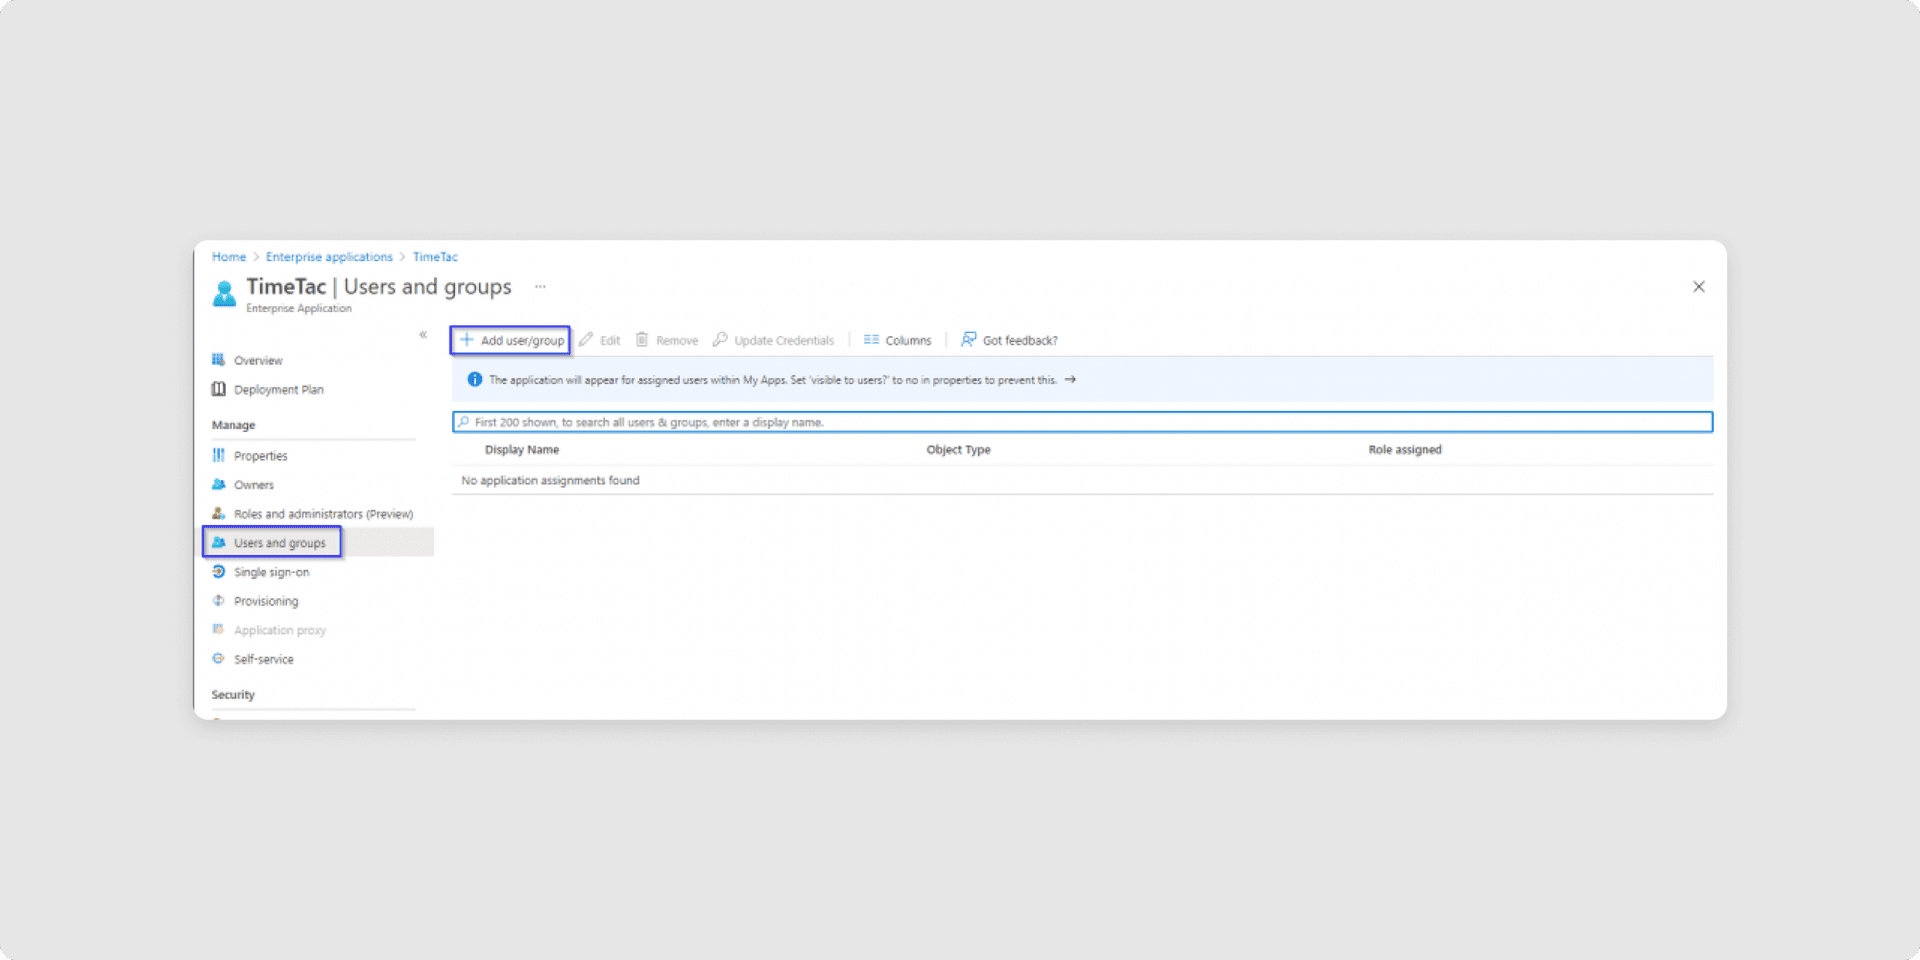
- Select the option Users and groups from the left menu
- Click on Add user/group
- In the new window, Add Assignment, select the user or group you want to assign to the application.
- When finished, click Select and then Assign.
That's how you set up SSO access via Microsoft Entra ID.
Was this Article useful for you?
Yes, this was useful
No, this was not useful